Wireless Eduroam WindowsXP
Before you start
Be sure that your Windows XP supports WPA2
Windows XP SP2 may or may not have the ability to use WPA2 encryption out-of-the-box, depending on how old your installation is. If your box does not offer WPA2 encryption, you will need to install a patch from the Microsoft website (which requires "Windows Genuine Advantage" (WGA) verification of your installation). The download is available at: http://www.microsoft.com/downloads/details.aspx?displaylang=en&FamilyID=2726F32F-D52B-4F84-ACE8-F7FC20195769
Note: If your organisation is using EAP/TTLS do not use this guide!
Configuration
Start your Windows XP not configured for any network and therefore has no current connection. Right click on the tray icon for the wireless card and select Open Network Connections. This can also be done by right clicking on My Network Places icon or by choosing Network Connections from the Control Panel.
Locate the icon for the wireless card.
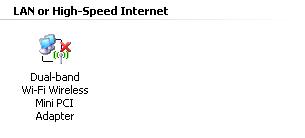
Right click on this icon and select Properties
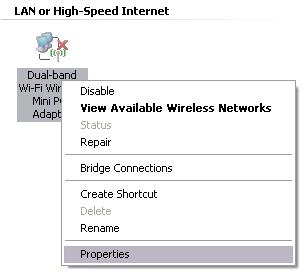
In this dialog box, choose Wireless Networks
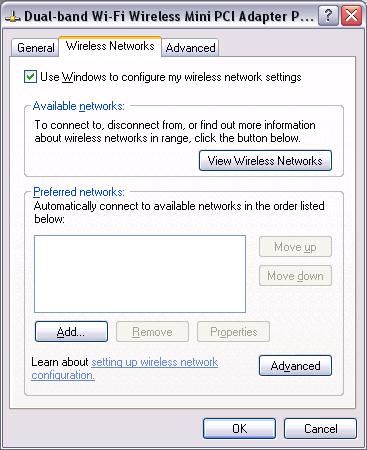
Check the box marked Use Windows to configure my wireless network settings
Press Add to add a new wireless profile.
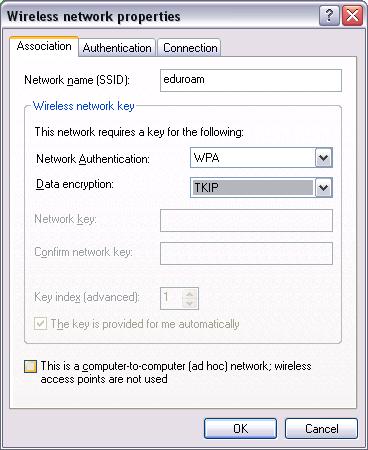
Insert the Network name (SSID) 'eduroam'
Network Authentication is 'WPA' and Data encryption is 'TKIP'
Select the tab Authentication
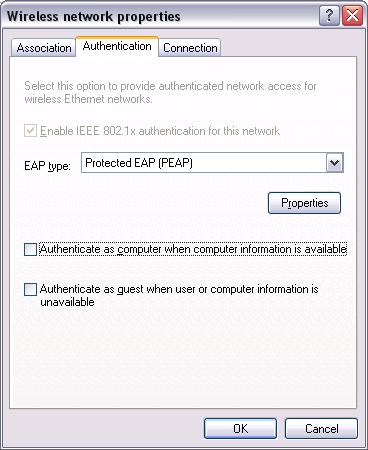
EAP type should be 'Protected EAP (PEAP)' in case if your insitution is using PEAP.
Be sure you uncheck Authenticate as computer when computer information is available and Authenticate as guest when user or computer information is unavailable
Select Properties
Select validate server certificate, set GTE Cybertrust Global Root as trusted root CA, and radius.ki.niif.hu as server name.
In the Select Authentication Method choose 'Secured password (EAP-MSCHAP v2)'.
Uncheck Enable Fast Reconnect
Press Configure... to configure MS-CHAPv2.
Remove the Automatically use my Windows logon name and password (and domain if any) if your eduroam username and password differs from what you use as Windows logon.
The main dialog window for wireless networks should look like this when finished with the profile
Press OK to finish the configuration
Back in the Windows workbench, the wireless card should now search for available wireless networks. When 'eduroam' is found, a yellow bubble will appear.
Click on this bubble to get a dialog window to enter the users' credentials.
Enter your full identity/username (username or username@yourrealm if you are roaming) and password. Let the Logon domain remain blank.
If everything went well you should get a message that you are attached to 'eduroam'.
In the list of available wireless networks you can see more details about your connection and given the option to disconnect.
 Campus IPv6 Wiki
 Supported by GVOP AKF